
Curious about cheek fillers? We get it—this isn’t exactly a spur-of-the-moment decision. Everyone wants the same intel: will these results vanish in three months or hang around for years? “How long does cheek filler last?” It depends on your unique situation, but let’s cut through the marketing fluff and talk real timelines, recovery experiences, and smart money moves.
HS MedSpa has guided individuals from diverse backgrounds through this process. We’ve figured out which factors actually influence your results and which “expert tips” are just wishful thinking. Consider this your no-nonsense roadmap to understanding duration, spotting trouble early, and maximizing your investment’s impact.
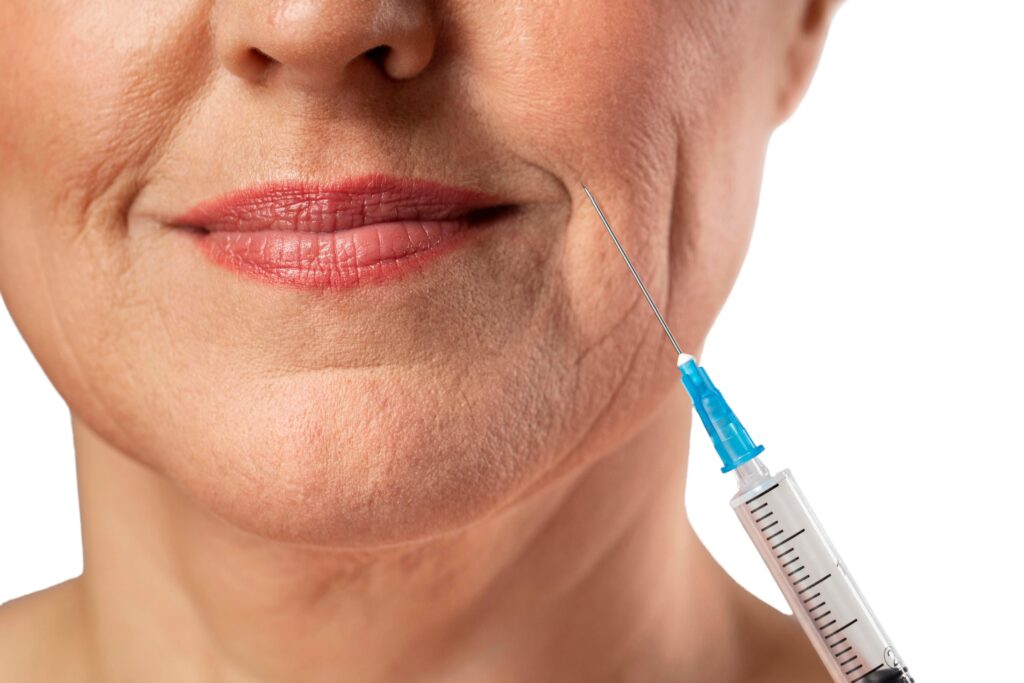
The Magic Behind Cheek Enhancement: What Does Cheek Filler Actually Do?
What does cheek filler do beyond just adding volume? Think of it as strategic facial architecture. These injectable treatments target specific areas to create multiple benefits:
Your cheekbones gain definition and height, creating that coveted sculpted look. Smile lines soften as the midface gets proper support. Lost volume due to aging or weight loss is restored naturally. Facial asymmetry improves with precise placement. The overall effect? A subtle “liquid facelift” without going under the knife.
Most modern cheek fillers use hyaluronic acid—a substance your body already produces. It attracts moisture like a magnet, keeping treated areas plump and hydrated for months.
Duration Decoded: How Long Your Investment Actually Lasts
Here’s the truth about how long cheek filler lasts: expect anywhere from 6 to 18 months, depending on several factors we’ll explore. But first, let’s break down the timeline by product type.
Hyaluronic Acid Champions (Juvederm, Restylane)
Standard formulas typically deliver 6-12 months of results. Volumizing versions like Voluma can stretch to 12-24 months. Thicker consistency products often reach the 18-month mark.
Calcium Hydroxylapatite (Radiesse)
Usually provides 12-15 months of enhancement. The bonus? It stimulates natural collagen production, allowing improvements to continue developing for months after the injection.
Poly-L-Lactic Acid (Sculptra)
The marathon runner of fillers—lasting 18- 24+ months or longer. Results build gradually over 3-6 months as your body creates new collagen.
Here’s something most people don’t realize: cheek areas actually hold onto filler longer than lips or other highly mobile zones. Less muscle movement means less breakdown.
The Science of Staying Power: What Makes Some Results Last Longer
Your timeline depends on several key variables. Understanding these helps set realistic expectations.
Your Body’s Processing Speed
Fast metabolizers burn through filler more quickly, sometimes 2-4 months earlier than the average person. It’s like having a sports car engine versus a hybrid. Both get you there, but one uses more fuel.
Placement Precision Matters
Deeper injections near the bone structure last significantly longer. Surface-level placement breaks down faster. Strategic positioning by skilled injectors maximizes every drop.
Volume and Viscosity
Higher volumes tend to stick around longer. Thicker, more cohesive formulas resist breakdown better. Cross-linked hyaluronic acid provides superior durability compared to lighter formulations.
Your Daily Habits
Sun exposure accelerates breakdown—UV rays are filler’s enemy. Smoking reduces longevity through poor circulation. Heavy drinking can impact results. High-intensity workouts may speed up metabolism.
Age and Skin Health
Younger patients often enjoy extended results. Better skin elasticity provides more support. Previous treatments can affect the duration of subsequent injections.
Week-by-Week: Your Complete Transformation Timeline
Knowing exactly what to expect eliminates surprises and helps you plan accordingly. Here’s your detailed roadmap from injection to final results.
Day Zero (Treatment Day)
You’ll see immediate volume enhancement, but don’t judge your final results yet. Expect 20-30% more fullness than your target due to initial swelling. Minor asymmetry is completely normal—one side often swells more than the other initially. Take “before” photos now for comparison later. Apply ice packs immediately after leaving the clinic. Avoid strenuous exercise for the rest of the day.
What you might feel: Slight tenderness, possible mild throbbing
What’s normal: Immediate visible volume, some firmness when touching the area
What to avoid: Massaging the area, sleeping face-down, and alcohol consumption
Days 1-3 (The Puffy Phase)
This is peak swelling territory—don’t panic if you look dramatically overfilled. About 70% of patients experience their maximum swelling on day 2. Bruising might appear, especially if you bruise easily or take blood thinners. The treated area may feel firm or lumpy—this is the filler settling and is completely normal. Some patients report difficulty smiling widely during this phase.
What you might feel: Tenderness to touch, tight sensation in cheeks, mild discomfort when chewing
What’s normal: Significant puffiness, possible bruising in purple or yellow hues, asymmetrical swelling
Management tips: Sleep with head elevated, continue ice therapy, avoid salt and alcohol, stay hydrated
Days 4-7 (The Transition Week)
Swelling begins its retreat, dropping by approximately 50-60%. You’ll start glimpsing your actual results. Bruising typically peaks and then begins to fade. The tight feeling decreases noticeably. Most patients can return to normal social activities by day 5-7. Makeup can usually camouflage any remaining discoloration.
What you might feel: Much less tenderness, return of normal facial expressions
What’s normal: Gradual reduction in puffiness, bruising, and changing colors (purple to green to yellow)
Green light activities: Light exercise, normal work routine, social events with makeup
Week 1-2 (The Settling Period)
This is when magic happens. Swelling drops to about 10-20% of initial levels. Your true enhancement becomes visible—expect about 80% of your final result. The filler integrates with surrounding tissues, creating natural-looking contours. Any remaining firmness softens significantly. Most patients feel confident without makeup by the second week.
What you might feel: Natural facial movement returns completely, with minimal to no tenderness
What’s normal: Dramatic improvement in appearance, soft, natural texture
Perfect time for: Progress photos, resuming all normal activities, evaluating if touch-ups are needed
Week 3-4 (The 90% Mark):
Swelling is virtually gone—less than 5% remains. You’re seeing 90-95% of your final result. This is the ideal time for your follow-up appointment. Any minor asymmetries should be resolved. The filler feels completely natural when touching your face. Your provider can accurately assess if additional product is needed.
What you might notice: Cheeks feel like your natural tissue, complete return of normal sensation
What’s normal: Final positioning of filler, natural facial expressions, no residual tenderness
Decision time: Whether touch-ups are needed, scheduling the maintenance timeline
Month 1 (The Final Reveal)
Congratulations—you’re seeing your complete transformation. The filler has fully integrated, creating seamless enhancement. This is your true “after” state for comparison photos. Natural facial expressions return completely. The enhancement looks like it’s always been part of your face. Any necessary touch-ups should be completed now for optimal results.
What you’ll experience: Complete comfort, natural appearance, full facial mobility
What’s achieved: Maximum aesthetic benefit, final positioning, complete tissue integration
Action items: Final progress photos, touch-up decisions, maintenance planning
Months 2-6 (The Honeymoon Phase)
Enjoy your peak results! The filler remains at maximum volume and effectiveness. Your face has fully adapted to the enhancement. This period typically offers the most natural-looking, comfortable results. Many patients forget they’ve had treatment during this phase—it feels completely natural.
What to expect: Stable, consistent appearance, zero discomfort or awareness of filler
Maintenance focus: Sun protection, good skincare routine, healthy lifestyle habits
Monitoring: Subtle changes aren’t expected yet; results should remain consistent
Months 6-12 (The Gradual Fade)
Your body begins slowly metabolizing the filler—starting around month 6 for most patients. Volume decreases gradually by about 10-15% every 2-3 months. Fast metabolizers notice changes earlier, around month 4-5. The fade happens so gradually, you might not notice day-to-day changes. Photos from month 1 help track the transition.
What you might notice: Slight reduction in fullness, nasolabial folds may deepen slightly
Still normal: 60-80% of original enhancement remaining, natural facial appearance
Planning time: Scheduling maintenance appointments, deciding on timing for touch-ups
Months 12-18 (Decision Point)
Most patients reach their personal “refresh threshold” during this window. You’ll retain about 20-40% of the original enhancement. The exact timing depends on your metabolism, lifestyle, and the type of filler used. Some Voluma patients maintain good results through months 18-24. This is when you’ll schedule your next treatment to maintain consistent results.
Assessment time: Compare current state to month 1 photos, evaluate satisfaction levels
Planning phase: Book a maintenance appointment, discuss any adjustments with your provider
Normal variations: Some areas may fade faster than others, overall facial proportions shifting back gradually
Swelling SOS: Managing Day-After Concerns Like a Pro
Experiencing cheek filler swelling the day after treatment? Totally normal. Here’s how to handle it gracefully.
Normal Swelling Patterns
Peak swelling hits 24-48 hours post-treatment. It decreases gradually over 1 to 2 weeks. Initial asymmetry happens due to individual healing patterns—your left and right sides may respond differently.
Smart Swelling Solutions
Ice packs work wonders—apply for 10-15 minutes several times daily. Sleep with your head elevated for the first few nights. Skip blood thinners like aspirin unless medically necessary. Stay hydrated but avoid excessive salt. Gentle massage only if your provider specifically recommends it.
Red Flag Symptoms
Contact your provider immediately if you experience severe pain or throbbing. Excessive redness or warmth signals potential problems. Signs of infection include fever or discharge. Unusual discoloration needs professional evaluation. Persistent asymmetry after 2 weeks requires attention.
Disaster Detection: Spotting Bad Cheek Filler Before It’s Too Late
While complications are rare with experienced providers, recognizing the signs of bad cheek filler protects your safety and appearance.
Warning Signals
“Pillow face” appearance screams overfilling—unnaturally puffy and round. “Sunset eyes” occur when overfilled cheeks make eyes appear smaller. Asymmetry persisting beyond 2 weeks indicates problems. Visible lumps or bumps that don’t resolve need intervention. Skin discoloration (Tyndall effect) creates a bluish tint. Unnatural firmness or strange texture feels wrong.
Root Causes
Inexperienced injectors lacking proper training create most issues. Using the wrong filler types in specific areas can cause problems. Overfilling or improper placement destroys natural proportions. Poor injection technique leads to multiple complications. Contaminated products or unsafe practices create serious risks.
Correction Strategies
Hyaluronidase injections dissolve hyaluronic acid fillers quickly. Steroid injections treat inflammatory reactions effectively. Sometimes, waiting for natural metabolism is the best approach. Experienced providers can often correct issues with additional treatments.
When More Becomes Too Much: Recognizing Overfilled Cheeks
Too much cheek filler creates an unnatural appearance that can seriously impact your confidence and even your health.
Overfilling Red Flags
Overly round, apple-shaped cheeks look artificial. Natural facial contours disappear completely. Smiling becomes difficult or feels strange. Cheeks remain visible when looking straight down. Facial features appear disproportionate. Puffiness persists weeks after treatment.
Health Consequences
Impaired lymphatic drainage causes chronic swelling. Vascular compromise can occur in extreme cases. Repeated overfilling may stretch tissues permanently. Severe cases can alter the facial structure in the long term.
Recovery Options
Immediate dissolution using hyaluronidase works for HA fillers. Partial removal restores natural proportions gradually. Natural breakdown takes 6-18 months, depending on product type. Professional assessment determines the safest approach.
Pro Tips for Longer-Lasting Results
Want your dermal fillers to go the distance? These strategies help naturally extend your results.
Pre-Treatment Prep
Choose providers who specialize in facial anatomy—experience matters enormously. Discuss realistic expectations during consultation. Avoid blood thinners one week before treatment. Stay well-hydrated for optimal healing.
Post-Treatment Protocol
Follow aftercare instructions religiously—they exist for good reasons. Avoid excessive heat, such as saunas or hot yoga, for 48 hours. Protect skin from sun exposure with broad-spectrum SPF 30+. Maintain excellent skincare with hydrating products. Schedule maintenance before complete fade occurs.
Lifestyle Adjustments
Limit alcohol consumption—it accelerates fat breakdown. Stay consistently hydrated since hyaluronic acid binds water. Use high-quality skincare products with proven ingredients, such as vitamin C. Consider complementary treatments like Botox or professional facials for added benefits.
Professional Maintenance
Regular check-ins every 6-8 months help maintain optimal results. Touch-up treatments before complete fade require less product. Honest communication with your provider improves outcomes. Progress photos help determine perfect timing.
Perfect Timing: When to Book Your Next Appointment
Smart scheduling maximizes both results and budget efficiency.
The Sweet Spot Strategy
Schedule maintenance 2-4 weeks before complete fade occurs. This timing requires significantly less product for refresh. Results stay consistent without obvious fluctuations. Long-term costs decrease with this approach.
Maintenance Signals
The volume begins to decrease noticeably (usually at 60-70% remaining). Nasolabial folds start deepening again gradually. Cheekbone definition slowly diminishes. Overall facial proportions shift back toward the pre-treatment state.
Avoid the Waiting Game
Complete fade means starting from scratch—more expensive and time-consuming. Higher product volumes are needed for full correction. Longer downtime with larger injection sessions. Higher per-session costs overall.
When to Seek Immediate Medical Attention
Certain symptoms require urgent professional intervention—don’t hesitate to act.
Emergency Situations
Sudden vision changes or loss demands immediate medical care. Severe pain unrelieved by medication needs urgent evaluation. Skin blanching or white patches indicate vascular compromise. Rapidly spreading redness suggests a serious infection. Signs of vascular occlusion require emergency treatment.
Urgent Concerns
Fever or systemic symptoms need prompt attention. Excessive swelling beyond day three isn’t normal. Unusual discharge from injection sites indicates infection. Severe asymmetry persisting beyond normal timeframes requires evaluation. Any signs of spreading infection need immediate care.
Provider Selection: Your Key to Safe, Beautiful Results
The difference between gorgeous, natural results and potential disasters often comes down to provider selection.
Essential Credentials
Board certification in dermatology or plastic surgery provides a foundational level of safety. Extensive experience in facial anatomy ensures proper technique. Specialized injection training prevents common mistakes. Emergency preparedness protects against rare complications.
Quality Indicators
Before-and-after galleries showcase realistic, natural results, and comprehensive consultations thoroughly explore all options. Honest assessments about achievable outcomes build trust. Clear aftercare protocols demonstrate professionalism. Accessible follow-up scheduling shows ongoing commitment.
HS MedSpa‘s experienced team combines medical expertise with artistic vision. We understand that beautiful results require both technical skill and aesthetic sensibility.

The Real Truth About Cheek Filler Longevity
How long does cheek filler last? The honest answer varies, but with proper planning, quality products, and skilled providers, expect 6-18 months of confidence-boosting results.
Your Action Plan
Prioritize provider quality over bargain pricing—your face deserves the best. Understand the complete timeline from initial swelling to final results. Learn warning signs early to prevent serious complications. Plan maintenance treatments strategically before complete fade. Never compromise safety for aesthetic goals.
Making It Work
Research providers thoroughly before committing. Ask detailed questions during consultations. Follow all pre- and post-treatment instructions precisely. Maintain realistic expectations throughout the process. Communicate openly with your provider about concerns.
Your Journey to Confident, Beautiful Cheeks
Cheek fillers offer an incredible opportunity to enhance your natural beauty safely and effectively. Understanding how long cheek fillers last, recognizing potential issues, and choosing the right provider sets you up for success.
At HS MedSpa, we’re committed to helping you achieve your aesthetic goals with the highest safety standards and most natural-looking results possible. Our expert team specializes in creating beautiful, long-lasting transformations with premium dermal fillers.
Ready to discover what expertly placed cheek fillers can do for your confidence? Contact us today to schedule your personalized consultation and take the first step toward your most beautiful self.
Leave a Reply